How to Spy on Your Android Phone
Ever wonder what your phone is really up to? This tutorial will show you how to closely inspect the information flowing in and out of your mobile applications. You might be surprised to see where your information is going.
We’ll use an application called “Burp Suite” – a common tool used by security researchers analyzing web applications. This will capture most standard app traffic, but sneakier apps could certainly get around it.
The Setup⌗
I’ll be using a Mac laptop and an Android-powered Blackberry Priv. Yes, I use a Blackberry. No, I’m not typing this from 2005.
This tutorial should work just as easily for Linux and Windows users paired with an Android phone. iPhone users will have to research that bit on their own.
- Make sure that your laptop and your phone are both connected to the same wireless network.
- Download and install Burp Suite free edition onto your laptop. You can get it here.
Configure Burp Suite to Listen⌗
Burp Suite is going to act as an HTTP proxy, logging all of your phone’s attempts to access the Internet before sending them on. Most apps use HTTP/S via an API to phone home, so this will naturally work with the proxy.
- Launch Burp Suite. If it asks you to update, take care of that now.
- I’m guessing you’re a bum like me and still using the free version of Burp. On the welcome screen, your only option is “Temporary Project”. Select that and click “Next”.
- The next screen should ask you to “Select the configuration…”. Select “Use Burp defaults” and click “Start Burp”.

You should now see Burp’s main interface. There’s a lot of cool shit here. After reading this blog, it’s a tool worth spending some serious time learning. But for now, head on over to the “Proxy” tab up top and configure as follows:
- Under Proxy > Intercept (where you should be now), click on the button titled “Intercept is on”. This should toggle it to “off” as shown below. What this means is that your phone will be allowed to freely communicate with the Internet without you manually approving each request.
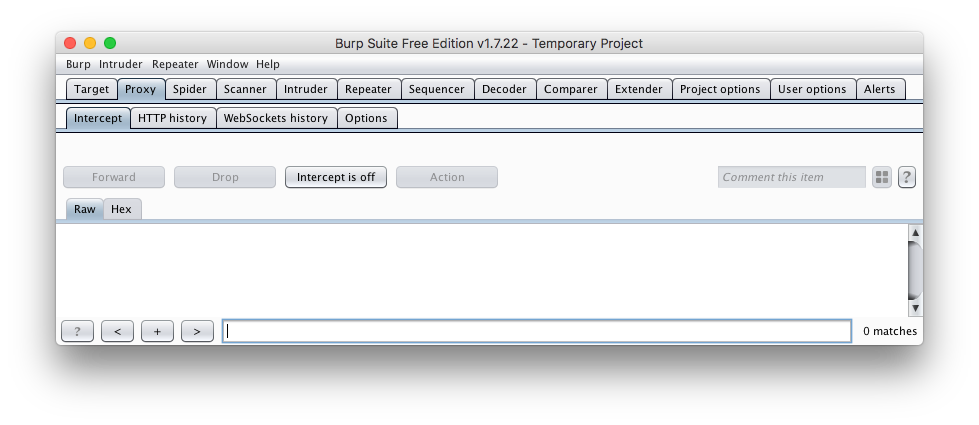
2.Still under the “Proxy” tab, click on the “Options” sub-tab. You should see this:
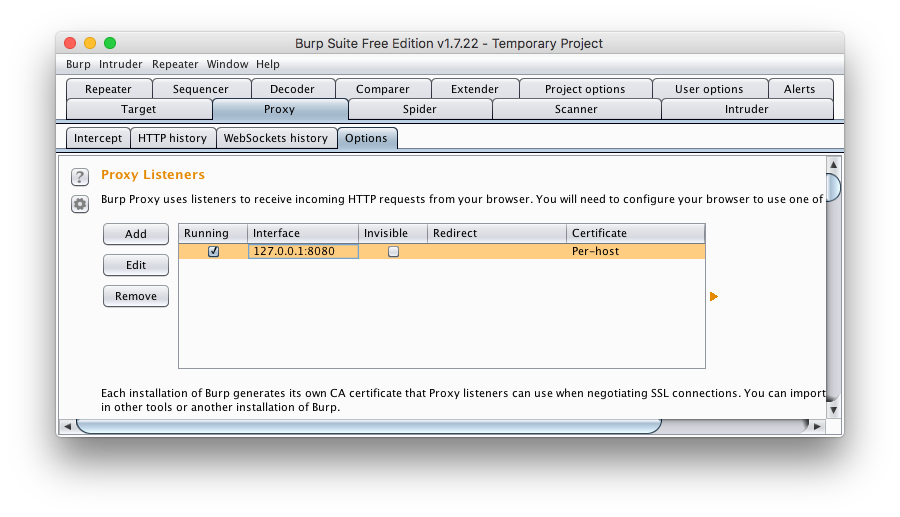
- Make sure that the “running” box is checked. Now click on “Edit” and for “Bind to address” make sure you select “All interfaces”. This allows you to connect to Burp both locally from your laptop as well as from other devices on your wireless network (like your phone). Don’t do this on public wifi or at work, unless you really know what you’re doing.
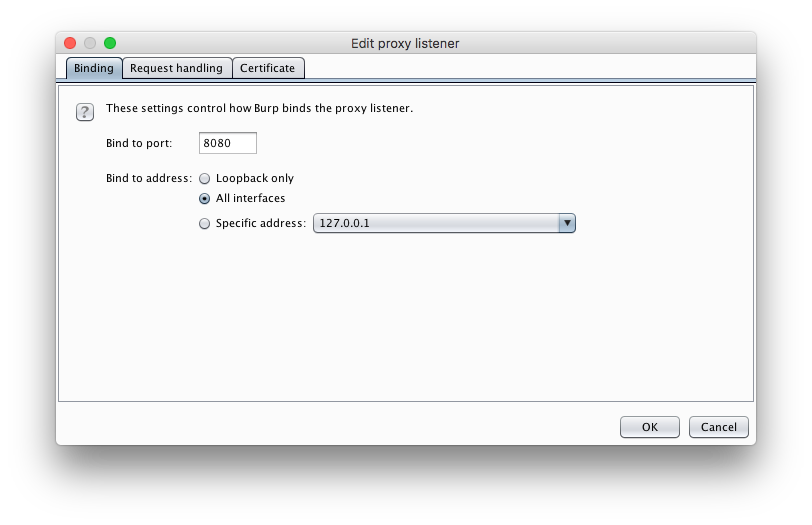
- Click “OK”. You’ll get a warning that other users on your network can use the proxy and view its history. Like I said, don’t do this at Starbucks. 🙂 After clicking “Yes” on the warning, your laptop may ask if it’s ok to allow Burp to listen for incoming connections. You’ll need to approve that as well. Now, hopefully, your screen should look like this:
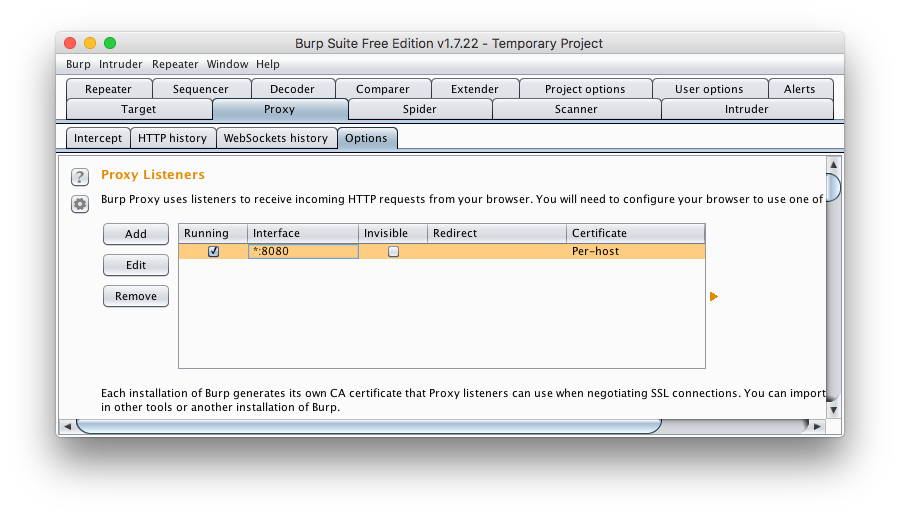
- Keep Burp Suite running. It’s ready to go now.
- Make note of the LAN IP address in use by the wireless interface on your laptop. If you are reading this blog, I imagine you probably already know how to do that. (Hint: it doesn’t start with 127.)
Configure your Phone⌗
OK, this section may be a bit phone-specific. If you can’t find any of these settings, let me know and maybe I can help.
- Open up the “Settings” screen. Under “Wireless and networks” select “WiFi”.
- You should now see a list of wireless networks in your area. Hopefully one of them shows up as “Connected” and is the same network your laptop is on. Hold your finger down on this network until a menu pops up.
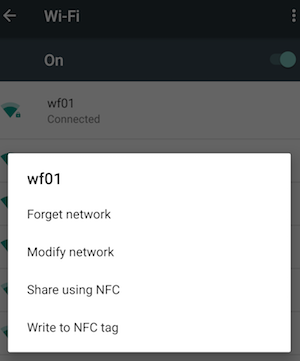
- Select “Modify network”.
- Click the little arrow next to “Advanced” options. You should see one called “Proxy” that is probably set to “None”. Chane that to “Manual”.
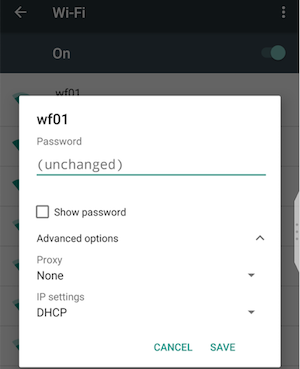
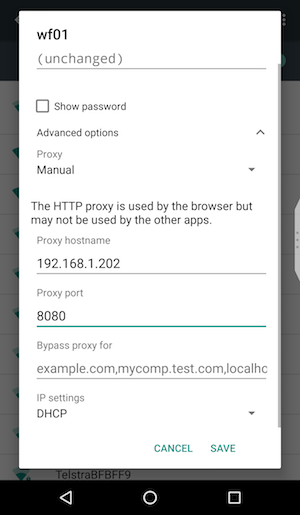
- You can now specify your laptop as the proxy server. You need to fill in the following:
- Proxy hostname: use the IP address from your laptop here
- Proxy port: if you didn’t change the default setting in Burp, this should be 8080
- Click “Save”.
You’re almost there! Actually, some apps may already be going through the proxy. Others may be freaking out a bit. This is because anything trying to communicate securely over the Internet is not going to trust your proxy server.
We’ll fix that next
Prep the CA Certificate for Android⌗
This is a one-time thing. We need to use the laptop now, unless you have the ability to rename a downloaded file on your phone (I don’t – wtf!).
- On your laptop, open up the browser of your choice and go to this URL: http://127.0.0.1:8080/
- As long as things are configured properly (i.e. Burp running on all interfaces) you should see this page:
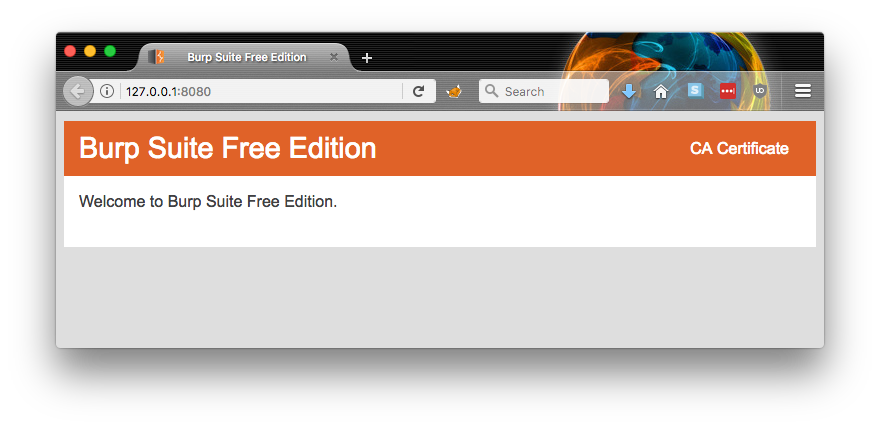
3.Click on “CA Certificate” in the upper right corner. This will prompt you to download a file called cacert.der. Cool. Save it somewhere local. 4. This part is important! You need to rename that cacert.der file that you just downloaded to cacert.cer. Really, it’s the file extension that is important. 5. Now, you need to get that file to your Android phone somehow. I just use email, and then download the attachment from the email client on my phone. This one is up to you – you can do it!
Install the Certificate in Android⌗
OK, back to your phone now. Again, this may be slightly device-specific.
- Go to “Settings”.
- Select “Security”. For me, this is under “Personal”.
- Down near the bottom of this menu, under “Credential Storage” select “Install from SD card (install certificates from SD card).
- Find the cacert.cer file that you saved onto your phone earlier and click on it.
- Now you can name the certificate. I called mine Burp. If your phone is asking you to select something for “Credential use” then select “VPN and apps”. (Hint: don’t select “WiFi”)
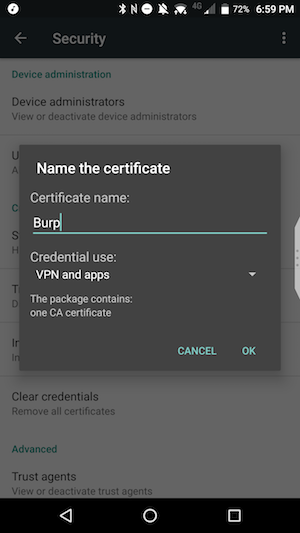
- Click OK. You should see a brief message that it was installed successfully.
Spy Away!⌗
You’re all set now. Go back to Burp Suite and select “HTTP History” under the same “Proxy” tab we looked at before.
This history will start to fill up with requests as you open and interact with your mobile apps. I like to sort by the first column (marked with a #) so I can see requests scroll by live as I go. It’s also fun to leave it connected overnight to see what happens while you’re asleep.
Highlight any request and more details will show in the panes at the bottom of Burp. Explore through “Raw”, “Params”, and “Headers” to get a good feel for what’s going on. These requests will be especially interesting when doing things like logging in or uploading files.
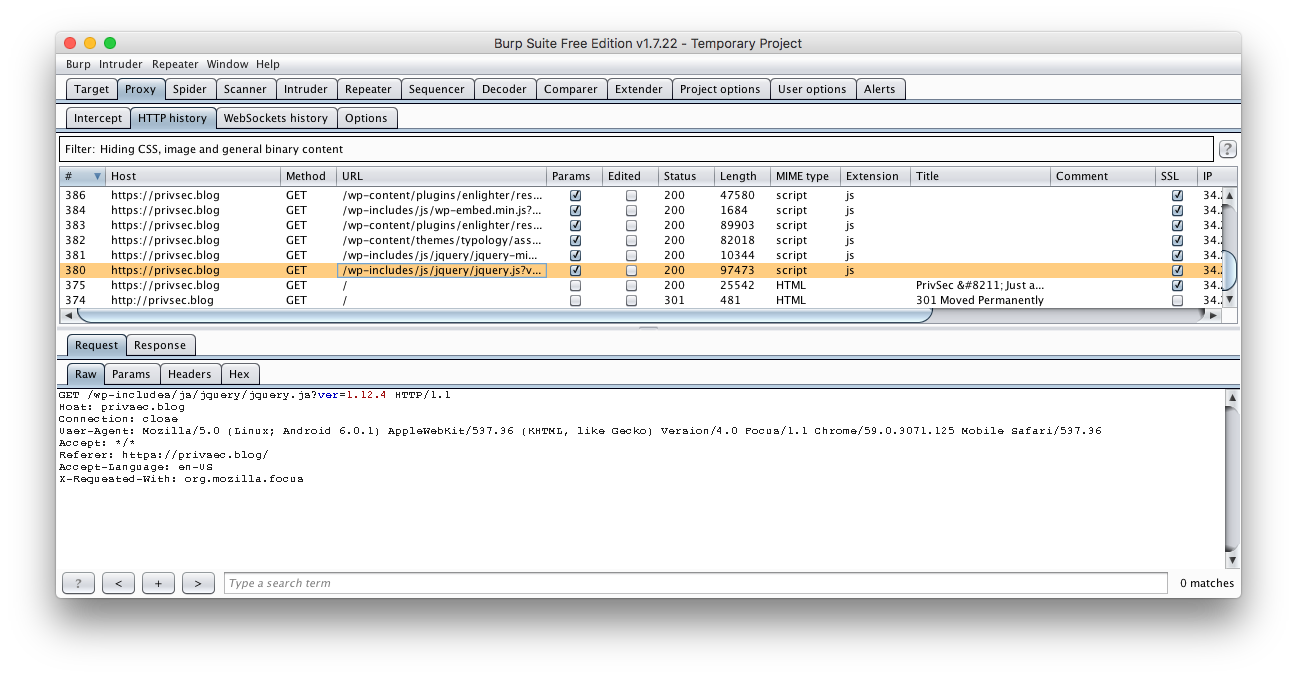
See anything fishy going on? I know I caught my apps sending device-specific data to Facebook. Funny, as I don’t even have a Facebook account, let alone the app installed.
Don’t Forget to Clean Up!⌗
You’ll want to set the proxy back to “None” on your phone once you’re done playing around. You may even want to delete the CA certificate you installed, as permanently trusting that may not be the best idea. Android will give you warnings when you reboot and it detects the certificate installed.
What Now?⌗
You’ll probably notice Burp’s history filling up pretty quickly. I may write a second blog on how to restrict it to one app at a time. Essentially, you can install an app like “NoRoot Firewall” on Android to limit one app at a time to access the Internet. Give that a go if you’re interested.
Also, if you made it this far successfully – why not learn more about what Burp can do? Once you have control of inbound AND outbound HTTP requests from your phone’s apps, you can make them do things that the developers never intended.
Have fun, and stay out of trouble!!!!
Note: some apps (like Facebook) have a mechanism to prevent this from working. This is due to something called “certificate pinning” which ensures that the certificate in use is their own. Your can still get some data from those apps, but not all. Check out “SSL Pass Through” in this link for configurations instructions.